

Google tag manager has always been a powerful tool to manage multiple tags since its launch in October 2012.
Those were the days when a website owner had to install multiple codes to the website to use services like website analytics, a conversion tracking, remarketing etc. that includes javascript integration on the website.
In result, the website used to become heavy & took time to load which leads to a drop in search engine ranking & traffic.
Since the Google Tag Manager introduced, it has become very easy to setup & manage multiple tags through it without keeping the websites in trouble.
Tracking Conversion Actions
If you are running any Google Ads, Facebook ads, email marketing or any other campaigning for your website then it is very important to measure the campaign success by setting up the tracking on conversion actions of the website such as Thank you page tracking, form submission tracking or Phone number tracking.
The thank-you page & contact us page tracking can be done easily via Google analytics by simply tracking the end URLs, but what about the phone numbers for the call you received?
Well, Google tag manager has made it simple by setting up a few tags & triggers.
In this guide, you will learn how to set up call tracking using Google tag manager.
Step 1: Configure Variables
Before the tags set up for your phone number tracking, you should enable some click variables to identify the unique values on each click on phone number on a webpage.
To enable, go to Google Tag manager > Choose Variable from Left menu > Click Configure >

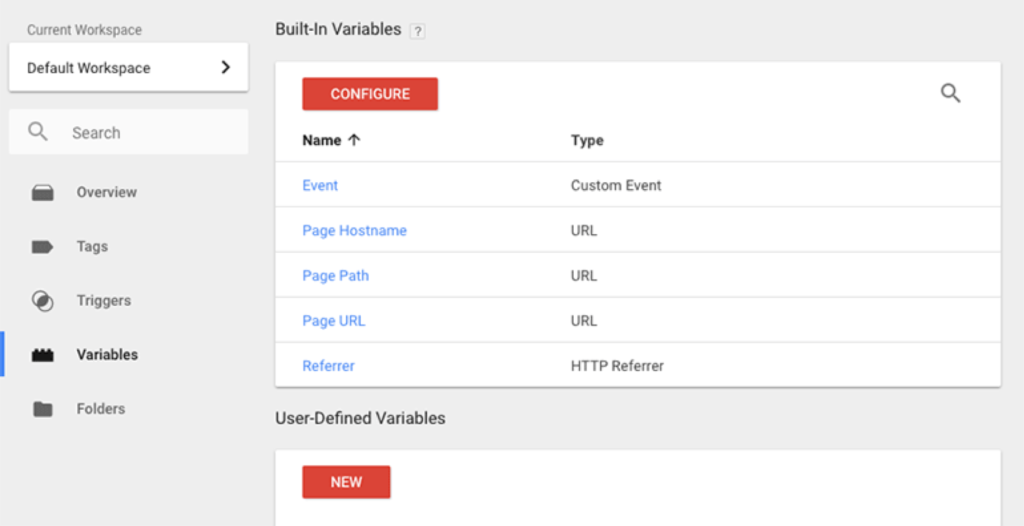
You will get a list a of variables where you have to choose the Click URL & Click Text under the Clicks section.

Once you select the Click URL & Click Text from close the window & navigate to the Triggers in the left navigation menu.
Step 2: Create a Trigger
To create a trigger for the phone number tracking, click on New under Triggers & choose a name for your tag i.e. ClickCall, Phone Click, Click on Phone etc.
Choose the trigger type as All Elements under clicks section & choose Some Clicks under it.
Select the Click URL from the list in the first column & choose contains in the second column from drop-down lists. Add tel: in the third column.


We have added tel: in the third column as the click URLs for phone number starts with tel: (just like page URL starts which https://).
That means the trigger will only fire when the click URL contains the value which we will put in the third column which is tel:
Step 3: Create a Tag:
Go to Tags from left side menu & click New. A popup window will appear for creating your tag. Name it as per your convenience as we did in step 2 when creating a trigger.
One you choose any name i.e. Phone Click, Click on Phone etc. then select your tag type as Universal Analytics.


Switch the tag type from Page View to Event & add your event tracking parameters like category, Action & label as per your understanding along with the Google Analytics property ID.


Once you do the tag setup click on triggering section & choose the trigger which we created on step 2 for tracking phone calls & hit the save button.
Step 4: Verify the Tag from the Preview Tool
Once you save this tag, click on the preview button to view the live preview on your website.

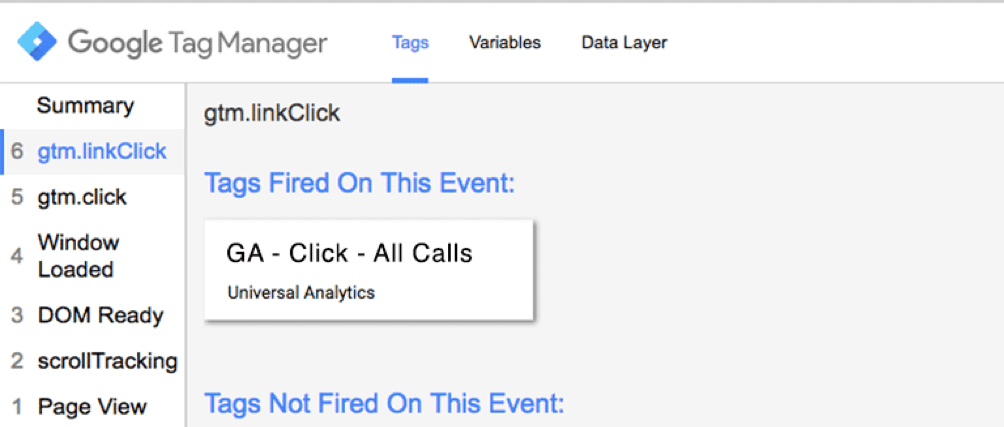
If everything goes well, just go back to the Google Tag Manager & hit the Submit button.
It will ask you the version name & description before saving which is completely optional.
It is better to name each version when you save so that you can remember & make necessary edits when something goes wrong.
Step 5: Setup Reporting in Google Tag Manager:
While testing the tags, you can simultaneously check the event tracking on Google Analytics real-time conversions.
It will take some time to populate the data in reporting in Google Analytics in Events reporting under the Behavior section.
You can create those events as goals, follow the steps below:
- Go to Google Analytics > Admin > Goals > Create
- Choose Custom from Goal template & click continue
- Name your Goal as per your understanding & choose goal type as Event then click continue
- In Goal details; add Category, Action, Label as per the report from Events reporting under Behavior section & click Save.

Once you are done with the above step, you can view the data in Goals Overview reporting in under conversion section.
Congratulations!!! You have just set up your phone call tracking. Now you can able to view how many calls you have got from different marketing channels such as emails, Google Ads, Facebook ads, organic etc. on a specific day, time & location.
Isn’t it easy? Let us know in comments if you feel any trouble in setting up this goal or have any suggestion for it.